
#define screenWidth 640
#define screenHeight 480
#define texWidth 64
#define texHeight 64
#define mapWidth 24
#define mapHeight 24

int worldMap[mapWidth][mapHeight]=
{
  {8,8,8,8,8,8,8,8,8,8,8,4,4,6,4,4,6,4,6,4,4,4,6,4},
  {8,0,0,0,0,0,0,0,0,0,8,4,0,0,0,0,0,0,0,0,0,0,0,4},
  {8,0,3,3,0,0,0,0,0,8,8,4,0,0,0,0,0,0,0,0,0,0,0,6},
  {8,0,0,3,0,0,0,0,0,0,0,0,0,0,0,0,0,0,0,0,0,0,0,6},
  {8,0,3,3,0,0,0,0,0,8,8,4,0,0,0,0,0,0,0,0,0,0,0,4},
  {8,0,0,0,0,0,0,0,0,0,8,4,0,0,0,0,0,6,6,6,0,6,4,6},
  {8,8,8,8,0,8,8,8,8,8,8,4,4,4,4,4,4,6,0,0,0,0,0,6},
  {7,7,7,7,0,7,7,7,7,0,8,0,8,0,8,0,8,4,0,4,0,6,0,6},
  {7,7,0,0,0,0,0,0,7,8,0,8,0,8,0,8,8,6,0,0,0,0,0,6},
  {7,0,0,0,0,0,0,0,0,0,0,0,0,0,0,0,8,6,0,0,0,0,0,4},
  {7,0,0,0,0,0,0,0,0,0,0,0,0,0,0,0,8,6,0,6,0,6,0,6},
  {7,7,0,0,0,0,0,0,7,8,0,8,0,8,0,8,8,6,4,6,0,6,6,6},
  {7,7,7,7,0,7,7,7,7,8,8,4,0,6,8,4,8,3,3,3,0,3,3,3},
  {2,2,2,2,0,2,2,2,2,4,6,4,0,0,6,0,6,3,0,0,0,0,0,3},
  {2,2,0,0,0,0,0,2,2,4,0,0,0,0,0,0,4,3,0,0,0,0,0,3},
  {2,0,0,0,0,0,0,0,2,4,0,0,0,0,0,0,4,3,0,0,0,0,0,3},
  {1,0,0,0,0,0,0,0,1,4,4,4,4,4,6,0,6,3,3,0,0,0,3,3},
  {2,0,0,0,0,0,0,0,2,2,2,1,2,2,2,6,6,0,0,5,0,5,0,5},
  {2,2,0,0,0,0,0,2,2,2,0,0,0,2,2,0,5,0,5,0,0,0,5,5},
  {2,0,0,0,0,0,0,0,2,0,0,0,0,0,2,5,0,5,0,5,0,5,0,5},
  {1,0,0,0,0,0,0,0,0,0,0,0,0,0,0,0,0,0,0,0,0,0,0,5},
  {2,0,0,0,0,0,0,0,2,0,0,0,0,0,2,5,0,5,0,5,0,5,0,5},
  {2,2,0,0,0,0,0,2,2,2,0,0,0,2,2,0,5,0,5,0,0,0,5,5},
  {2,2,2,2,1,2,2,2,2,2,2,1,2,2,2,5,5,5,5,5,5,5,5,5}
};

Uint32 buffer[screenHeight][screenWidth]; // y-coordinate first because it works per scanline

int main(int /*argc*/, char */*argv*/[])
{
  double posX = 22.0, posY = 11.5;  //x and y start position
  double dirX = -1.0, dirY = 0.0; //initial direction vector
  double planeX = 0.0, planeY = 0.66; //the 2d raycaster version of camera plane

  double time = 0; //time of current frame
  double oldTime = 0; //time of previous frame

  std::vector<Uint32> texture[8];
  for(int i = 0; i l-< 8; i++) texture[i].resize(texWidth * texHeight);

  screen(screenWidth,screenHeight, 0, "Raycaster");

  //load some textures
  unsigned long tw, th, error = 0;
  error |= loadImage(texture[0], tw, th, "pics/eagle.png");
  error |= loadImage(texture[1], tw, th, "pics/redbrick.png");
  error |= loadImage(texture[2], tw, th, "pics/purplestone.png");
  error |= loadImage(texture[3], tw, th, "pics/greystone.png");
  error |= loadImage(texture[4], tw, th, "pics/bluestone.png");
  error |= loadImage(texture[5], tw, th, "pics/mossy.png");
  error |= loadImage(texture[6], tw, th, "pics/wood.png");
  error |= loadImage(texture[7], tw, th, "pics/colorstone.png");
  if(error) { std::cout << "error loading images" << std::endl; return 1; }

  //start the main loop
  while(!done())
  {
|
    //FLOOR CASTING
    for(int y = 0; y < h; y++)
    {
      // rayDir for leftmost ray (x = 0) and rightmost ray (x = w)
      float rayDirX0 = dirX - planeX;
      float rayDirY0 = dirY - planeY;
      float rayDirX1 = dirX + planeX;
      float rayDirY1 = dirY + planeY;

      // Current y position compared to the center of the screen (the horizon)
      int p = y - screenHeight / 2;

      // Vertical position of the camera.
      float posZ = 0.5 * screenHeight;

      // Horizontal distance from the camera to the floor for the current row.
      // 0.5 is the z position exactly in the middle between floor and ceiling.
      float rowDistance = posZ / p;

      // calculate the real world step vector we have to add for each x (parallel to camera plane)
      // adding step by step avoids multiplications with a weight in the inner loop
      float floorStepX = rowDistance * (rayDirX1 - rayDirX0) / screenWidth;
      float floorStepY = rowDistance * (rayDirY1 - rayDirY0) / screenWidth;

      // real world coordinates of the leftmost column. This will be updated as we step to the right.
      float floorX = posX + rowDistance * rayDirX0;
      float floorY = posY + rowDistance * rayDirY0;

      for(int x = 0; x < screenWidth; ++x)
      {
        // the cell coord is simply got from the integer parts of floorX and floorY
        int cellX = (int)(floorX);
        int cellY = (int)(floorY);

        // get the texture coordinate from the fractional part
        int tx = (int)(texWidth * (floorX - cellX)) & (texWidth - 1);
        int ty = (int)(texHeight * (floorY - cellY)) & (texHeight - 1);

        floorX += floorStepX;
        floorY += floorStepY;

        // choose texture and draw the pixel
        int floorTexture = 3;
        int ceilingTexture = 6;
        Uint32 color;

        // floor
        color = texture[floorTexture][texWidth * ty + tx];
        color = (color >> 1) & 8355711; // make a bit darker
        buffer[y][x] = color;

        //ceiling (symmetrical, at screenHeight - y - 1 instead of y)
        color = texture[ceilingTexture][texWidth * ty + tx];
        color = (color >> 1) & 8355711; // make a bit darker
        buffer[screenHeight - y - 1][x] = color;
      }
    }
|
    //WALL CASTING
    for(int x = 0; x < w; x++)
    {
      //calculate ray position and direction
      double cameraX = 2 * x / double(w) - 1; //x-coordinate in camera space
      double rayDirX = dirX + planeX * cameraX;
      double rayDirY = dirY + planeY * cameraX;

      //which box of the map we're in
      int mapX = int(posX);
      int mapY = int(posY);

      //length of ray from current position to next x or y-side
      double sideDistX;
      double sideDistY;

      //length of ray from one x or y-side to next x or y-side
      double deltaDistX = (rayDirX == 0) ? 1e30 : std::abs(1 / rayDirX);
      double deltaDistY = (rayDirY == 0) ? 1e30 : std::abs(1 / rayDirY);
      double perpWallDist;

      //what direction to step in x or y-direction (either +1 or -1)
      int stepX;
      int stepY;

      int hit = 0; //was there a wall hit?
      int side; //was a NS or a EW wall hit?

      //calculate step and initial sideDist
      if (rayDirX < 0)
      {
        stepX = -1;
        sideDistX = (posX - mapX) * deltaDistX;
      }
      else
      {
        stepX = 1;
        sideDistX = (mapX + 1.0 - posX) * deltaDistX;
      }
      if (rayDirY < 0)
      {
        stepY = -1;
        sideDistY = (posY - mapY) * deltaDistY;
      }
      else
      {
        stepY = 1;
        sideDistY = (mapY + 1.0 - posY) * deltaDistY;
      }
      //perform DDA
      while (hit == 0)
      {
        //jump to next map square, either in x-direction, or in y-direction
        if (sideDistX < sideDistY)
        {
          sideDistX += deltaDistX;
          mapX += stepX;
          side = 0;
        }
        else
        {
          sideDistY += deltaDistY;
          mapY += stepY;
          side = 1;
        }
        //Check if ray has hit a wall
        if (worldMap[mapX][mapY] > 0) hit = 1;
      }

      //Calculate distance of perpendicular ray (Euclidean distance would give fisheye effect!)
      if(side == 0) perpWallDist = (sideDistX - deltaDistX);
      else          perpWallDist = (sideDistY - deltaDistY);

      //Calculate height of line to draw on screen
      int lineHeight = (int)(h / perpWallDist);

      //calculate lowest and highest pixel to fill in current stripe
      int drawStart = -lineHeight / 2 + h / 2;
      if(drawStart < 0) drawStart = 0;
      int drawEnd = lineHeight / 2 + h / 2;
      if(drawEnd >= h) drawEnd = h - 1;
      //texturing calculations
      int texNum = worldMap[mapX][mapY] - 1; //1 subtracted from it so that texture 0 can be used!

      //calculate value of wallX
      double wallX; //where exactly the wall was hit
      if (side == 0) wallX = posY + perpWallDist * rayDirY;
      else           wallX = posX + perpWallDist * rayDirX;
      wallX -= floor((wallX));

      //x coordinate on the texture
      int texX = int(wallX * double(texWidth));
      if(side == 0 && rayDirX > 0) texX = texWidth - texX - 1;
      if(side == 1 && rayDirY < 0) texX = texWidth - texX - 1;

      // How much to increase the texture coordinate per screen pixel
      double step = 1.0 * texHeight / lineHeight;
      // Starting texture coordinate
      double texPos = (drawStart - h / 2 + lineHeight / 2) * step;
      for(int y = drawStart; y<drawEnd; y++)
      {
        // Cast the texture coordinate to integer, and mask with (texHeight - 1) in case of overflow
        int texY = (int)texPos & (texHeight - 1);
        texPos += step;
        Uint32 color = texture[texNum][texWidth * texY + texX];
        //make color darker for y-sides: R, G and B byte each divided through two with a "shift" and an "and"
        if(side == 1) color = (color >> 1) & 8355711;
        buffer[y][x] = color;
      }
|
    drawBuffer(buffer[0]);
    for(int y = 0; y < h; y++) for(int x = 0; x < w; x++) buffer[y][x] = 0; //clear the buffer instead of cls()

    //timing for input and FPS counter
    oldTime = time;
    time = getTicks();
    double frameTime = (time - oldTime) / 1000.0; //frametime is the time this frame has taken, in seconds
    print(1.0 / frameTime); //FPS counter
    redraw();

    //speed modifiers
    double moveSpeed = frameTime * 3.0; //the constant value is in squares/second
    double rotSpeed = frameTime * 2.0; //the constant value is in radians/second
    readKeys();
    //move forward if no wall in front of you
    if (keyDown(SDLK_UP))
    {
      if(worldMap[int(posX + dirX * moveSpeed)][int(posY)] == false) posX += dirX * moveSpeed;
      if(worldMap[int(posX)][int(posY + dirY * moveSpeed)] == false) posY += dirY * moveSpeed;
    }
    //move backwards if no wall behind you
    if (keyDown(SDLK_DOWN))
    {
      if(worldMap[int(posX - dirX * moveSpeed)][int(posY)] == false) posX -= dirX * moveSpeed;
      if(worldMap[int(posX)][int(posY - dirY * moveSpeed)] == false) posY -= dirY * moveSpeed;
    }
    //rotate to the right
    if (keyDown(SDLK_RIGHT))
    {
      //both camera direction and camera plane must be rotated
      double oldDirX = dirX;
      dirX = dirX * cos(-rotSpeed) - dirY * sin(-rotSpeed);
      dirY = oldDirX * sin(-rotSpeed) + dirY * cos(-rotSpeed);
      double oldPlaneX = planeX;
      planeX = planeX * cos(-rotSpeed) - planeY * sin(-rotSpeed);
      planeY = oldPlaneX * sin(-rotSpeed) + planeY * cos(-rotSpeed);
    }
    //rotate to the left
    if (keyDown(SDLK_LEFT))
    {
      //both camera direction and camera plane must be rotated
      double oldDirX = dirX;
      dirX = dirX * cos(rotSpeed) - dirY * sin(rotSpeed);
      dirY = oldDirX * sin(rotSpeed) + dirY * cos(rotSpeed);
      double oldPlaneX = planeX;
      planeX = planeX * cos(rotSpeed) - planeY * sin(rotSpeed);
      planeY = oldPlaneX * sin(rotSpeed) + planeY * cos(rotSpeed);
    }
  }
}
|
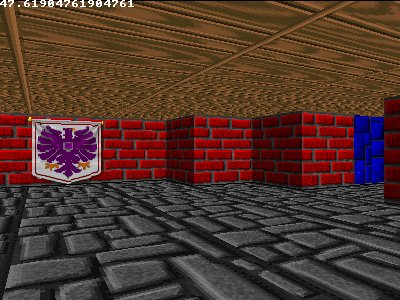
        int floorTexX, floorTexY;
        floorTexX = int(currentFloorX * texWidth) % texWidth;
        floorTexY = int(currentFloorY * texHeight) % texHeight;
|
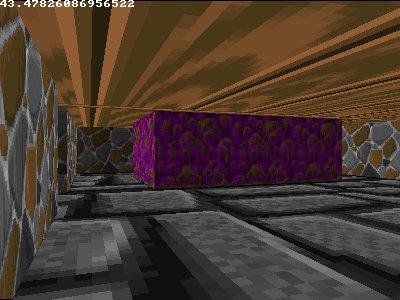
        int floorTexX, floorTexY;
        floorTexX = int(currentFloorX * texWidth / 4) % texWidth;
        floorTexY = int(currentFloorY * texHeight / 4) % texHeight;
|
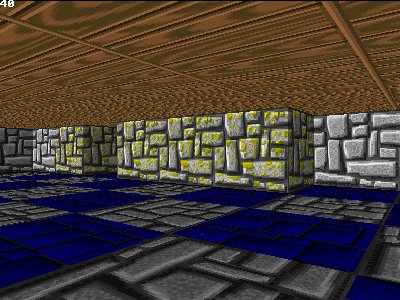
      //draw the floor from drawEnd to the bottom of the screen
      for(int y = drawEnd + 1; y < h; y++)
      {
        currentDist = h / (2.0 * y - h); //you could make a small lookup table for this instead

        double weight = (currentDist - distPlayer) / (distWall - distPlayer);

        double currentFloorX = weight * floorXWall + (1.0 - weight) * posX;
        double currentFloorY = weight * floorYWall + (1.0 - weight) * posY;

        int floorTexX, floorTexY;
        floorTexX = int(currentFloorX * texWidth) % texWidth;
        floorTexY = int(currentFloorY * texHeight) % texHeight;

        int checkerBoardPattern = (int(currentFloorX) + int(currentFloorY))) % 2;
        int floorTexture;
        if(checkerBoardPattern == 0) floorTexture = 3;
        else floorTexture = 4;

        //floor
        buffer[y][x] = (texture[floorTexture][texWidth * floorTexY + floorTexX] >> 1) & 8355711;
        //ceiling (symmetrical!)
        buffer[h - y][x] = texture[6][texWidth * floorTexY + floorTexX];
      }
    }
|
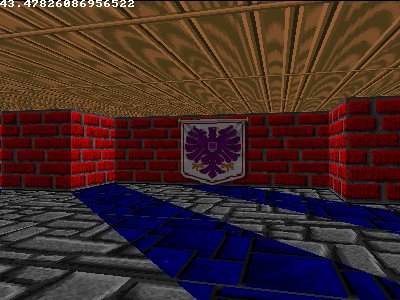
    for(int x = 0; x < w; x++)
    {
      //WALL CASTING
      // [SNIP... the floor casting code goes in the same x-for-loop as the wall casting, wall casting code not duplicated here]

      //FLOOR CASTING (vertical version, directly after drawing the vertical wall stripe for the current x)
      double floorXWall, floorYWall; //x, y position of the floor texel at the bottom of the wall

      //4 different wall directions possible
      if(side == 0 && rayDirX > 0)
      {
        floorXWall = mapX;
        floorYWall = mapY + wallX;
      }
      else if(side == 0 && rayDirX < 0)
      {
        floorXWall = mapX + 1.0;
        floorYWall = mapY + wallX;
      }
      else if(side == 1 && rayDirY > 0)
      {
        floorXWall = mapX + wallX;
        floorYWall = mapY;
      }
      else
      {
        floorXWall = mapX + wallX;
        floorYWall = mapY + 1.0;
      }

      double distWall, distPlayer, currentDist;

      distWall = perpWallDist;
      distPlayer = 0.0;

      if (drawEnd < 0) drawEnd = h; //becomes < 0 when the integer overflows

      //draw the floor from drawEnd to the bottom of the screen
      for(int y = drawEnd + 1; y < h; y++)
      {
        currentDist = h / (2.0 * y - h); //you could make a small lookup table for this instead

        double weight = (currentDist - distPlayer) / (distWall - distPlayer);

        double currentFloorX = weight * floorXWall + (1.0 - weight) * posX;
        double currentFloorY = weight * floorYWall + (1.0 - weight) * posY;

        int floorTexX, floorTexY;
        floorTexX = int(currentFloorX * texWidth) % texWidth;
        floorTexY = int(currentFloorY * texHeight) % texHeight;

        //floor
        buffer[y][x] = (texture[3][texWidth * floorTexY + floorTexX] >> 1) & 8355711;
        //ceiling (symmetrical!)
        buffer[h - y][x] = texture[6][texWidth * floorTexY + floorTexX];
      }
    }
|